
Tags
Andy's birthday party, boys birthday party, free downloads, free printables, Lego bricks, Lego Ninjago, Lego Ninjago birthday party, Lego Ninjago party decorations, Legos, Masters of Spinjutsu, ninja design, Ninja theme, ninja theme party, Ninjago birthday party, Ninjago faces, Ninjago lollipops, ninjas, party favors, printables, treat bags
Hey world!
It’s been a while would be an understatement! It was quite a struggle trying to find time for eating and sleeping while studying for medical school, so this blog was definitely put on the back burner.
After so many requests, I felt that I had to complete this series of the Lego Ninjago birthday party. I thought it would be quick and easy, just attach my files and share my printables with all of those who had been patient with me…but unfortunately, I did not realize that I deleted all my craft/design files while I was preparing to clean my laptop out for school!
But don’t worry! I felt so bad that people have been asking and waiting, I took the time off today to re-create the printables for the treat boxes and bag labels.
So let’s start with the easy one: Lego Ninjago Birthday Party Treat Boxes

I bought the chinese take-out style boxes from Michaels. They have all the colors available. Just select the colors you wanted for your ninjas. We used black, red, blue, and white.

Then just print out the Lego Ninjago Eyes and adhere to the boxes. I printed on sticker paper so I was able to just cut around the yellow face part (cut out the shadow of the mask), peel the sticker, and stick it right on the box! Easy!
Also on this printable: Lego Ninjago Pops
For the smaller Lego Ninjago Eyes, cut and stick on lollipops that have been wrapped with colored streamers to give “Ninjago Pops.” I don’t have pictures of the complete step-by-step of how I did it, but I have a few from my phone.
Here are some tips: Tootsie roll pops worked the best and start wrapping with the colored streamer from the stick of the pop first and then tighten as you go around.


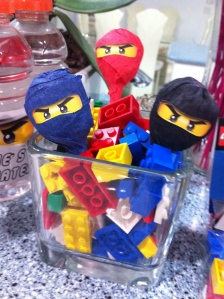
Here’s an example of the pops we made. I placed them in clear vases with lego bricks to fill them up.
Next: My most proud party favor! These amazingly cute Ninja Bricks Treat Bags.

I bought a set of assorted Lego bricks from Toys R Us.
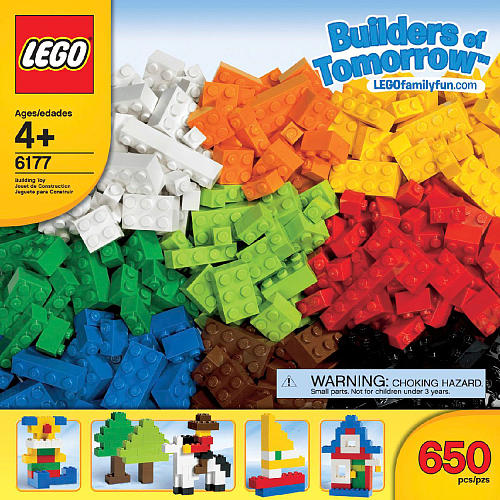 I only selected and used the colors of Ninjago (red, black, white, yellow, and blue) to stay within the theme. Grabbing a handful, I placed them in clear treat bags I found at Walmart. These can also be found in any craft store. Just try to get the ones that are 4″ in width because the Ninjago Ninja Bricks Treat Bag Labels are made for this size. Fold and close the bags using a staple. Then use GlueDots to help stick the treat bag labels on.
Lastly, we placed some goodies in the Ninja treat boxes and then allowed the kids to fill it with items collected from the pinata. Some of the treats that we decided to add were:
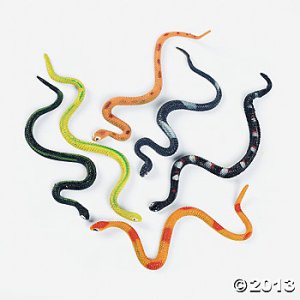
Rubber/Plastic Snakes (In the cartoon series, the snakes are the bad guys). These are an example. We bought ours at Target toys section.

Chinese Finger Traps

Ninja Stars made by my sister

The Ninja Pops we made

And some goodies I found in the clearance section of Party City for only 50 CENTS! I decided to make them Ninjago themed by covering them up with printables I made and printed them on sticker paper for an easy cover-up.
Finally to end this Ninago party creation set, I wanted to share the amazing “Punch Out” Game my sister made for the party. She did not take pictures step by step, but I’m sure there are instructions on other sites. The kids loved this so much! They are able to punch the Ninja’s face for a prize =)

Please also visit Part 1 and Part 2 for more free Ninjago party ideas and printables.
And that’s all folks! Thank you everyone for your patience and waiting! I hope you have fun making these treats for your little ninjas and best of luck on your Lego Ninjago party!!!
